Effortless Messy Bun Tutorial

With summer approaching so soon (1 week EEEEE!) it’s time to give your hair a break. What better time for an easy, quick and cute hair style? Currently, I’m all about giving my hair a break from heat and throwing it up in a bun. The messy ballet bun is perfect for summer days and nights. The best part about this hairstyle is you can make it as messy or neat as you’d like.

So for this tutorial I will walk you through the 10 easy steps I take to do a messy ballet bun. 

1. Brush through your hair and make sure it’s nice and dry. (lol at my face)

unnamed2. Pull all your hair into a high pony leaving your hand several inches from your scalp.

unnamed-2

3. Wrap your hair around your index finger like a doughnut, make sure your index finger is touching your head.

unnamed-3

4. Secure the bun with a Hair Tie, I recommend using a thicker one.

unnamed-4

5. Pull hair around your face to loosen the bun.

unnamed-5

6. Secure the bun with a second elastic hair tie.

unnamed-6

7. Mess up your bun with your fingers & secure bun with Bobby Pins.

unnamed-7

8. Make sure your bobby pins are securing your bun to your hair tie.

unnamed-8

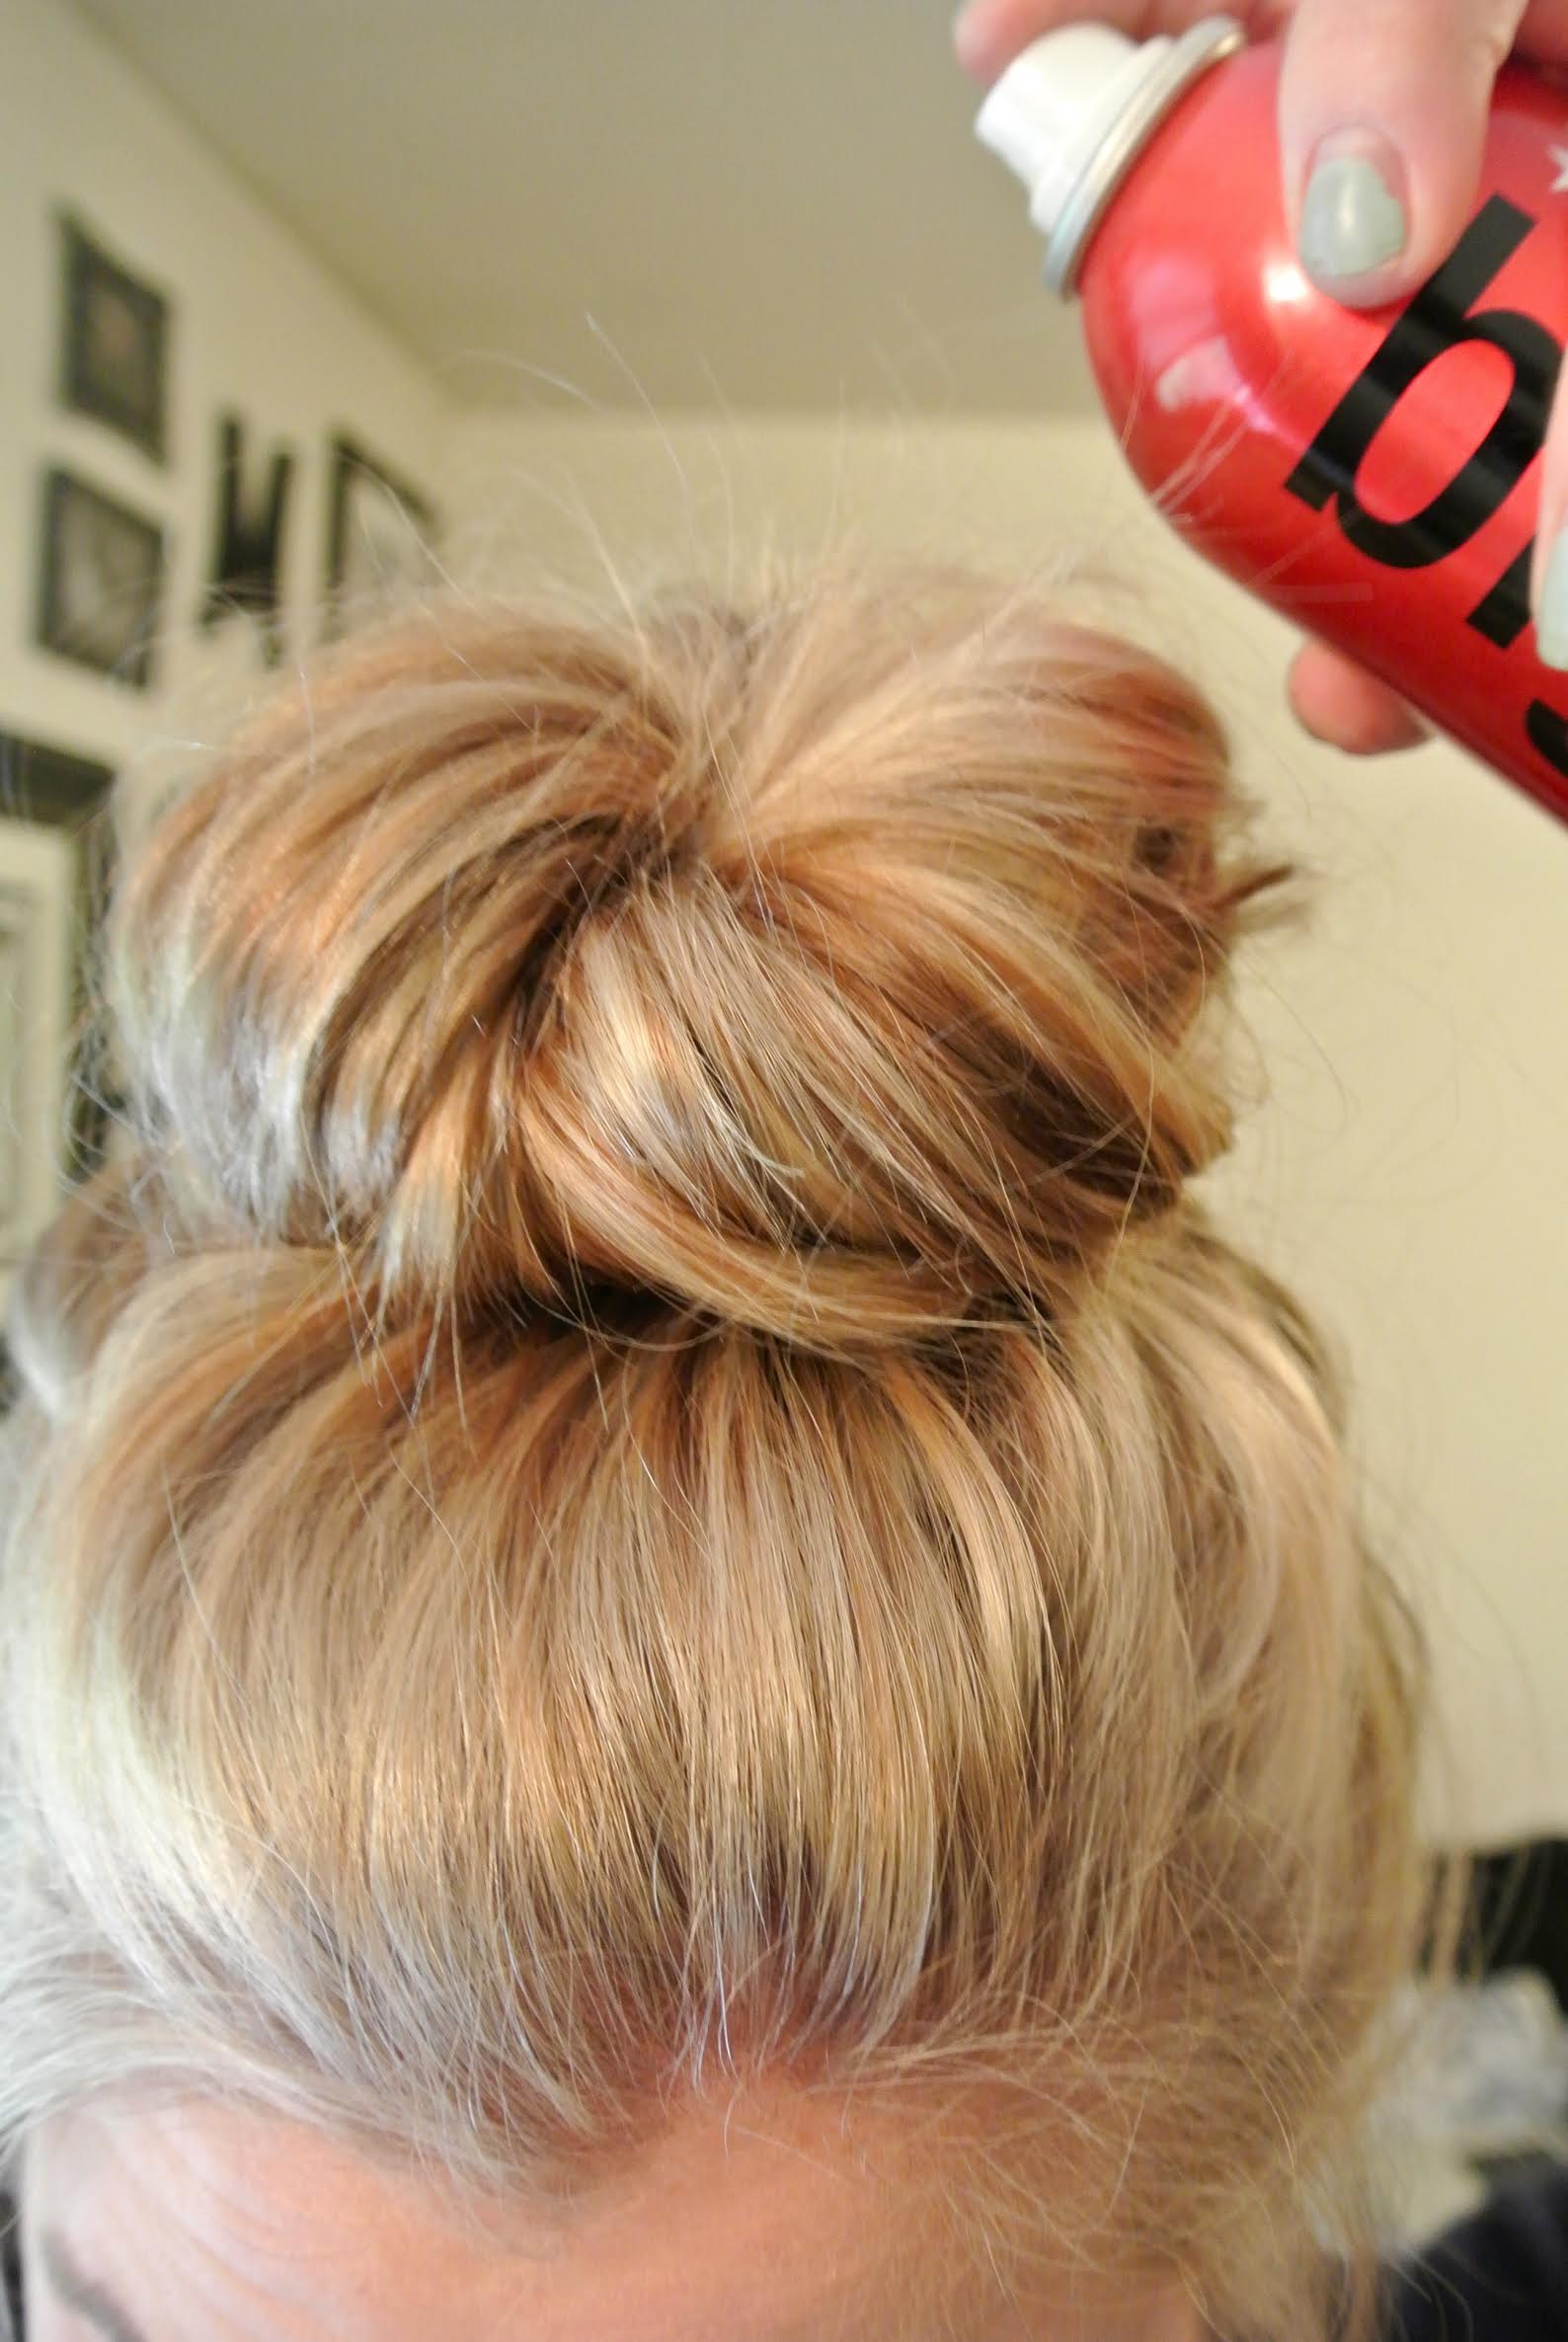
9. Spray your bun with Hairspray to give it some hold.

unnamed-11

10. Loosen pieces around the crown of your head to finish the look.

unnamed-13

And there you have it ladies! 10 easy steps for an effortless messy bun, perfect for any summertime look.

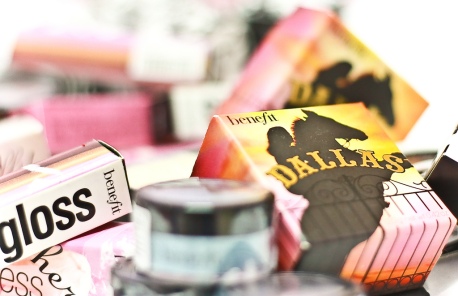
Here are the products I used:

1.  The Wet Brush

2.  Hair Elastics/Ties

3.  Bobby Pins

4.  Hairspray 

I hope you enjoyed this tutorial!

XO Martha 

Do blondes really have more fun?

My whole life I have loved being a blonde and never thought about changing my color.  My sophomore year of college is when I wanted to change up my hair. The process of adding more lowlights into my hair started in the beginning of 2013. Even though the last two years I have been adding more and more depth to my hair, this past January I finally dyed the majority of my hair brunette.

May 2012

May 2012

I was hesitant to go completely brunette, so I left my ends light to achieve the ombre look. The responses I received were mixed, either people loved the dark or didn’t care for it.  So I decided to become fully brunette and after 3 months I decided never again.

January 2015

January 2015

Although this experience was fun while it lasted, I enjoy being a blonde more. Dying your hair color is a fun to change up your look every once in a while. (because why not?)

These are the lessons I’ve learned through this process:

  1. It truly only matters what you think of yourself
  2. Do what makes you feel beautiful, confident and happy
  3. Pay the extra money to get your hair done by a professional** (I made the mistake recently and never again)
  4. Experiment with your hair while you can, college is a great time to try new styles and trends
  5. Embrace change
  6.  It’s hair, it grows back and can always be fixed (I wore large headbands 3 days straight lol)

Now with summer quickly approaching, it’s a great time to take a few risks and try something new.

Here are a few ideas:

  • add a pop of color (kylizzle’s blue hair for Chochella was fab)
  • add some extensions ( what better time for mermaid length hair than summer?)
  • go natural : lay off the heat and give your hair a break. Spritz in some sea salt spray for amazing beachy waves
  • embrace the messy bun: throw it up and you’re good it go
  • braid it up: braiding your hair is another great way to leave heat off your hair and out of your face (my personal favorite is a great messy fishtail
Kylie Jenner Via Instagram April 2015

Kylie Jenner Via Instagram April 2015

Messy Briad Via Pinterest

Messy Braid Via Pinterest

IPSY: My April Glam Bag Review

For those of you who don’t know, IPSY is a monthly subscription of different beauty products. The company sends you different samples of new beauty products based off of a quiz you take when you sign up. Your Glam Bag is customized to your personal skin type, eye color, hair color and overall beauty style. They never disappoint and you can retake your quiz as often as you please.

Next month it will be a year since I joined the IPSY world and I couldn’t be more pleased. (who doesn’t love getting a surprise package in the mail?!) Inside you get a unique makeup bag that is stuffed with your monthly goodies. Yesterday I received mine in the mail and thought I’d share with ya’ll what I got!

April Glam Bag

April Glam Bag

 First off, can I start with how much I love this new makeup bag?? From the bright colors, to the straw-like texture, it screams summer and the beach. In each Glam bag you usually receive 5 products.

This month I got:

  1. REDKEN , Wind Blown 05 Dry Finishing Spray
  2. Hikari Blush 
  3. theBalm , Nude Dude Eyeshadow Single
  4. Gallany Lipstick
  5. Mullein & Sparrow, Mini Lip & Cheek Tint

Overall I’m happy with my products this month. The wind blown spray, blush and eye shadow I can’t wait to use this summer. I have recently have started to incorporate lipsticks into my beauty routine, but the shade this month is more of a fall color. Also the lip and Cheek tint is a plum color so I will throw that into my purse come fall.

I think IPSY is great for anyone who is on a budget yet wants to branch out with new beauty products. I have found some pretty amazing products from my Glam Bag that I would have never discovered otherwise.

XO Martha

REDKEN Wind Blown Dry Finishing Spray

REDKEN Wind Blown Dry Finishing Spray

Gallany Lipstick

Gallany Lipstick

Hikari Blush

Hikari Blush

NUDE Dude Eyeshadow Single

NUDE Dude Eyeshadow Single

Mini Lip & Cheek Tint

Mini Lip & Cheek Tint

It’s all about the lash

There is nothing worse than when you are applying your mascara and before you know it all your lashes are clumped together. There are multiple factors to consider if this happens to you frequently. Are you using the correct mascara for your lashes? How do you apply the mascara? Do you need a different wand? What kind of lash look are you going for? etc..

Before you even start to apply your mascara make sure you have the correct mascara for you lashes. Personally, for mine I need a plastic wand. This help separate my lashes when applying the mascara. The two main mascaras I switch off between They’re Real and Telescopic. Next is you should always curl your lashes. This helps shape them before you apply the product. When you are ready to apply your mascara start at the very bottom of your lashes and wiggle the wand side to side as your move up your lashes. This will ensure you are getting your lashes fully covered without clumping. Repeat this process until satisfied.

What They Don’t Tell You… 

  1. NEVER pump your mascara. This creates air pockets in your mascara and will cause it to dry out quicker
  2. Coat BOTH sides of your lashes. This is key to achieving the fullest & longest lashes.
  3. Do not curl your lashes AFTER you have already apply your mascara. This lead to major clumping
  4. Use the end of the brush to separate your lashes or place them in a certain position. (that’s what it’s there for)
  5. Take you time. Don’t rush your mascara, let your coats set.

Like any other makeup products, mascara is all about testing out the product to see which gives you the best results. Since they can get pricey, I recommend buying the small travel size first before you buy the regular one. My absolute favorite is They’re Real by benefit, it is long lasting while lengthening and gives me great volume. During the day if I’m running errands or at school I use Telescopic, for the price you can’t go wrong. Recently I have tried out two more mascaras, Roller Lash and Better than Sex. Benefit’s Roller Lash is meant to curl your lashes even more. I can tell that even without curling my lashes before, the wand really helps to curl them. (I still prefer They’re Real) Lastly, Better than Sex. This is also a great mascara. Unfortunately, the brush tends to make my lashes clump together so I have to prep my lashes before with a different mascara. But it will still give you those amazing lashes.

My Top Mascaras

My Top Mascaras

“I won’t cry for you, my mascaras too expensive” -Adriana Lima 

XO- Martha

Organize Organize Organize!

There is nothing worse then when you are getting ready and you can’t find that one eyeliner or lipstick. I know from personal experience that this can be extremely irritating especially when you are already running late. (story of my life) So to prevent the unnecessary frustration, I have developed an organization system that works for me.

My Makeup Drawer

My Makeup Drawer

I divide my makeup into categories.

  • Lips
  • Face powders
  • Foundations/Concealers
  • Eye Shadows
  • Brushes
  • Tools
  • Eyeliners
  • Mascaras

From there I went to Walmart and Bed Bath & Beyond and bought storage containers that fit the different shapes and sizes of my makeup. This was a cheap and effective way of organizing my makeup. I find that by having my makeup organized, my time spent getting time is shorter and I prevent spills. There are many other ways to organize your makeup, so get creative with what works best for you. My only piece of advice for anyone growing their makeup collection is do not keep it in one bag all together. That is the quick way to ruin your makeup, powders can crack, liquids can spill, brushes bend and the results are never fun to clean up.

Up close of my foundations, concealers, lipsticks, lip liners and lip glosses.

Up close of my foundations, concealers, lipsticks, lip liners and lip glosses.

 Check out The Container Store for great, affordable drawer organizers!

Enjoy!

XO Martha


Back to the Basics

Okay ladies, the key to every successful makeup bag/drawer is having a great set of basics. Your basics are your go to products that you use everyday. If you were to ever splurge on makeup products you would want to use the money towards buying great products that set up the rest of your look. These basics includes: foundation, mascara, eyeliner, concealer, primer and powders (face and finishing). I feel that if a girl has a solid set of products that work for her and skin then half the work is already done!

There are a couple reason why I find buying quality basic products are beneficial:

  1. They last longer
  2. They do ‘most’ of the work for you

Finding products that work for your skin is a process, so hang in there! To begin, identify you skin type, whether you have oily, dry, or acne prone skin these are all factors to consider when buying your foundations, concealers, primers and powders. Personally I find that my skin is more oily especially during summer with the humidity in Wisconsin. (ugh) So it is important to look for foundations that say “matte finish” or “oil-free”. This also applies for ladies with dry skin. You will want to look for foundations that lay “glowing” or “luminous” because they will prevent your skin from becoming dry over the course of the day. Next look for a concealer that works for what you are trying to cover. This could be bags under your eyes, or that annoying blemish that appears at the most inconvenient time. For Mascara, you need to test out different products to see which formula and wand work best for your lashes. Eyeliner is just on which type is easier for you to apply, pencil or liquid (I use liquid).

3584834780_d4f4787525_b

My basics:

Primer: Prep + Prime $30

Foundation: Hello Flawless $36

Concealer: Boi-ing $20

Face Powder: Studio Fix $27

Finishing Powder: Smooth Focus Pressed Setting Powder $34

Bronzer: Bronzer Powder $39

Mascara: They’re Real! $23

Eyeliner: Liquid Eyeliner $7

Enjoy! XO

Welcome Welcome!

Since I can remember I’ve always had a fascination makeup. It all started when my mom would do my makeup once a year for my dance recital. I would sit on the counter in her bathroom in pure bliss as my mom would apply my stage makeup. As I grew older my love for makeup grew stronger. Friday nights I would spend watching my mom get ready for date night with my dad. My sister and I would try on our moms high heels and inspect her makeup drawer, only feeding our curiosity more. Fast Forward 15 years, here I am with my own makeup drawer growing and my passion for makeup as strong as ever!

Over the years I have learn trips and tricks along the way that I think every makeup enthusiast should know. This blog will be dedicated to sharing my beauty ‘secrets’. *By no means am I an expect in any way* Just your average makeup junkie here to share my perspective.

Enjoy XO